1. Materials
1.1 Material Selection
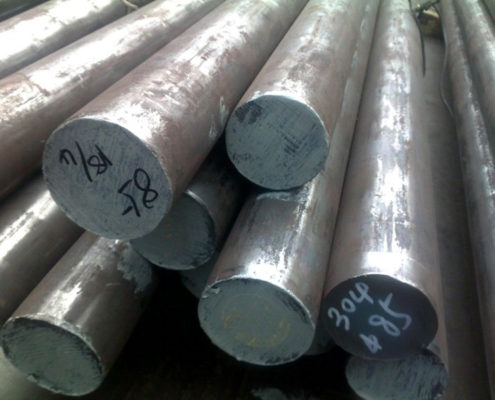
A. The mechanical properties and chemical compositions of the main pipe materials for flanges meet the requirements of the corresponding standards for forged blanks or sheets.
B. Carbon equivalent Ceq: Material carbon equivalent value should be appropriate. Excessive carbon equivalent will affect the weldability of material. Low carbon equivalent will affect the hardenability of steel tube in heating and the strength of quenched structure is low.
C. The surface of the selected material should be free of grease, excessive rust, flux and corrosives, low melting point metal pollution, obvious dent defects on the surface of the pipe body, and pay attention to the surface of the weld repair and the size of the pipe end.
D. The material marks are clear and complete and meet the technical requirements of the relevant provisions in the relevant standards.
1.2Selection of Materials
The blank selection of flange material should be based on the actual situation of flange forming and forging ratio. The blank calculation should be carried out according to the principle of constant weight. And issue process cards.
1.3 Material Inspection
A. Steel wire brush wheel angle grinder is used for mechanical rust removal on the surface of materials before inspection.
B. Surface dimension inspection and surface and dimension inspection of materials after rust removal.
C. Material analysis or spectral analysis according to furnace number to determine element content and performance test.
1.4 The traceability marking of materials is clear. In the manufacturing process, the number of furnace, batch number, length of raw materials, the number of materials after being rolled into straight seam tubes, the length of materials used, the location of materials used, etc., should be traceable records for material transplantation.
2. Product Processing Process
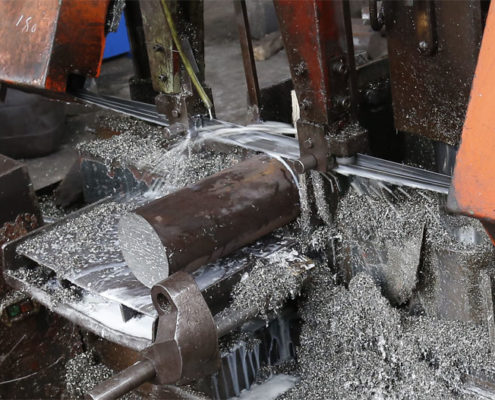
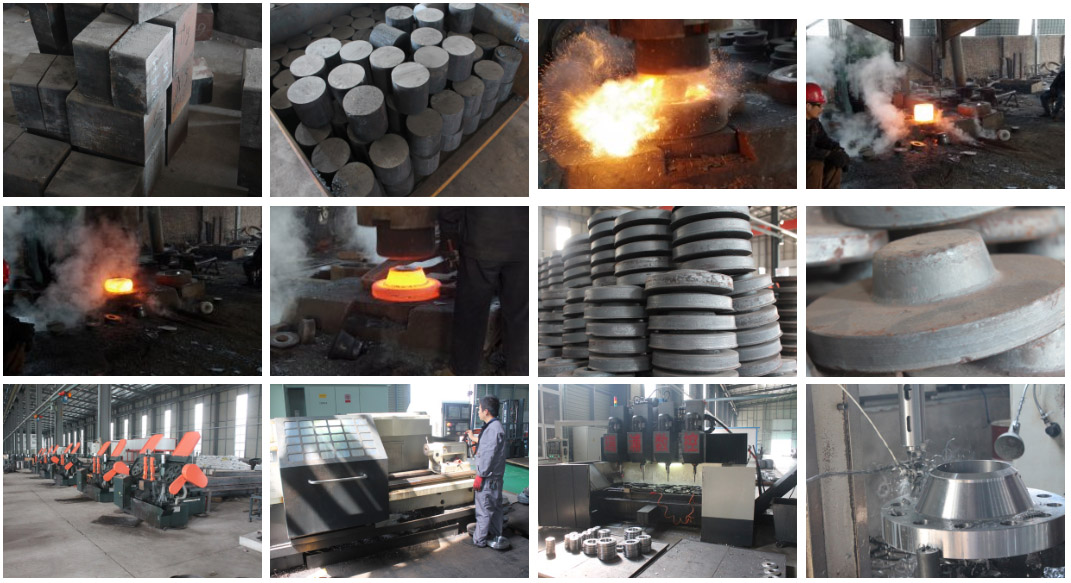
2.1 For the cutting of stainless steel materials according to user's specifications and sizes, it is most appropriate to use gantry band sawing machine for cold cutting and plasma cutting for cutting, so as to reduce the waste of materials and avoid the change of metallographic structure at the fracture or heat affected zone, and to prevent material from hardening during cutting. Layers or defects such as cracks caused by improper operation. After cutting, the port is polished with a grinding wheel polisher to remove the burrs and edges of the port. Carbon steel material is cut by oxygen-acetylene flame or sawing machine. In the process of cutting, it is required to carry out necessary labeling transplantation according to the material specifications and materials, and check the geometric size of the broken blank piece by piece.
2.2 Flange blank forging. Flanges are forged by placing qualified blanks in heating furnace according to the forging process requirements of the corresponding materials. The blanks of large-scale pipes are forged freely under the splint hammer. All flange blanks shall meet the above requirements of grade II forgings. The blanks of different materials are processed according to the requirements of the process cards for the corresponding heating temperature and holding time.
2.3 Tube blank (flange blank) heat treatment, according to the heat treatment process of different materials, heat treatment of hot (cold) processed tube and forged flange blank, in order to eliminate stress, refine structure, improve the strength and toughness of materials and other comprehensive properties. The heat treatment process is carried out according to the heat treatment process card. The process steps of heat treatment are as follows:
2.3.1 Check that all parts of heat treatment furnace, such as burner, thermometer, fan, oil pump system, trolley device and door lifting device, should be in normal standby state, and the fuel quantity of oil depot should meet the requirements of heat treatment.
2.3.2 Furnace charging: (1) Workpieces should be padded about 400 mm high, arranged so that the workpieces should not be compressed each other, 150 mm interval to prevent deformation and facilitate uniform cooling and heat dissipation. Layout according to the shape reasonably, draw the layout size sketch, and write the number to record. (2) The flange should be flat on the trolley to prevent the bend from deforming after being heated. (3) Adjust the firewall so that the flame does not spray directly onto the workpiece.
2.3.3 Before ignition, check whether the furnace sand seal is good or not. If there are cracks, use Refractory soil or aluminium silicate high temperature asbestos to seal.
2.3.4 When a heat treatment furnace ignites for a cold furnace, it is advisable to use half of the burners (that is, one burner is ignited at each interval, and all burners can be ignited for the furnace ignition, and attention should be paid to the heating rate, constant temperature and time cooling mode, etc.) which should conform to the heat treatment process.
2.3.5 Adjust the fuel supply and air flow of flue valves and nozzles, so that the temperature of heat treatment furnace is uniform and the temperature of thermocouples is uniform. The temperature of furnace is recorded by operators every 15 minutes.
2.3.6 Operators should inspect the operation of the oil furnace regularly, observe the combustion of the furnace through observation holes, and adjust the air and oil quantity of the burner in time when the burning is not good. If the temperature indication of the furnace is found to be in doubt, the optical pyrometer should be used to compare and find out the causes for treatment.
2.3.7 Close all nozzles and dampers before the workpiece is discharged, and fill in the Record of Heat Treatment Process Parameters.
The normalizing and tempering of 2.3.8 heat treatment can be carried out twice. If the normalizing is carried out continuously, the elbow temperature must be reduced to below 300 C before the tempering can be carried out.
2.3.9 The same stove must contain only the same material or the corresponding specifications of the flanges.
2.3.10 phase test should not be less than one stove; hardness test should not be less than two pieces per stove, and each piece should not be less than three points. The detection part is located in the base material of the pulled side and the maximum deformation area respectively.
2.4 Machining and forming, according to the specifications and models of different pipe fittings, according to the corresponding standard requirements, using lathes, drills and other machinery to machine and shape the blanks, so that the pipe products meet the standard requirements of the appearance and geometric size range. The inspection department inspects the products according to the standard geometric size and type tolerance requirements. Stainless steel pipes are passivated by acid pickling after machining, and intergranular corrosion detection is necessary.
3. Inspection and test (type test not undertaken by our company)
3.1 Surface Quality
3.1.1 No cracks, overheating, etc. shall exist on the surface of flange, and there shall be no hard spots on the surface.
3.1.2 Flange inner and outer surfaces should be smooth, without damage to strength and appearance defects, such as scars, scratches, heavy skins, etc. The defects found by inspection should be removed by grinding, and the grinding area should be smooth until the defects are eliminated by dyeing or magnetic particle inspection, and the thickness after grinding should meet the requirements.
3.1.3 The pits on the flange end body with a depth of more than 3.15 mm are not allowed to be repaired by hammering when the depth of the pits on the weld seam exceeds 1.5 mm.
Repair of 3.1.4 Defects
Cutting and scratching of sharp notches with a depth less than 5% of the nominal wall thickness should be smoothly repaired and smoothed.
Isolated circular bottom marks need not be ground.
3.1.5 No cracks, overheating, overheating or hard spots on flanges shall be allowed to repair defects in flanged pipes. No welding repair shall be allowed.
3.2 Geometric dimension inspection shall be carried out in accordance with the requirements of corresponding standard dimensions.
3.3. Nondestructive Testing of Hot Pressed Flanges
3.3.1 Non-destructive testing of flanges should be carried out after heat treatment of flanges. Commonly used magnetic powder, ultrasonic, radiographic and coloring testing methods, and non-destructive testing operation rules should be formulated.
3.3.2 The equipment used for magnetic particle detection should produce magnetic field perpendicular to the weld transverse direction, which is strong enough to show the surface of steel pipe welding, partial or incomplete fusion, weld discontinuity, cracks, cracks and scars.
3.3.3 The depth of all defects found by magnetic particle testing should be measured. When the display depth is greater than 5% of the prescribed wall thickness, the defects must be repaired.
3.3.4. When transverse wave testing is carried out by ultrasonic testing, the sensitivity of testing equipment should be calibrated by using the contrast standard sample. The contrast standard sample has the same technology, material and specifications as the measured sample. In the direction of vertical wall thickness of the contrast standard sample, the vertical through hole with 1.6 mm diameter should be drilled. If the signal generated by the defect is greater than or equal to 1.6 of the contrast standard sample. It is considered that the defect must be repaired when the echo height of the mm diameter through hole is 100%. If the signal produced by the defect is a layered defect, the longitudinal wave detection can be used. The sensitivity calibration of the longitudinal wave detection should be the same as that of the measured part in technology, material, specifications, drilling a 6 flat bottom hole on the comparative standard sample, and the depth of the flat bottom hole is half of the thickness of the measured part.
|

